Flow Integration
- 2 Minutes to read
Flow Integration
- 2 Minutes to read
Article Summary
Share feedback
Thanks for sharing your feedback!
In this example, we will set up a Flow to create a task for each member of a list of contacts and integrate it with Campaign Audience Builder so that it can be used to create related tasks for our audience results.
Our first step is to create a Flow in the Salesforce Flow Builder, which we'll then wire up with Campaign Audience Builder.
Flow Setup
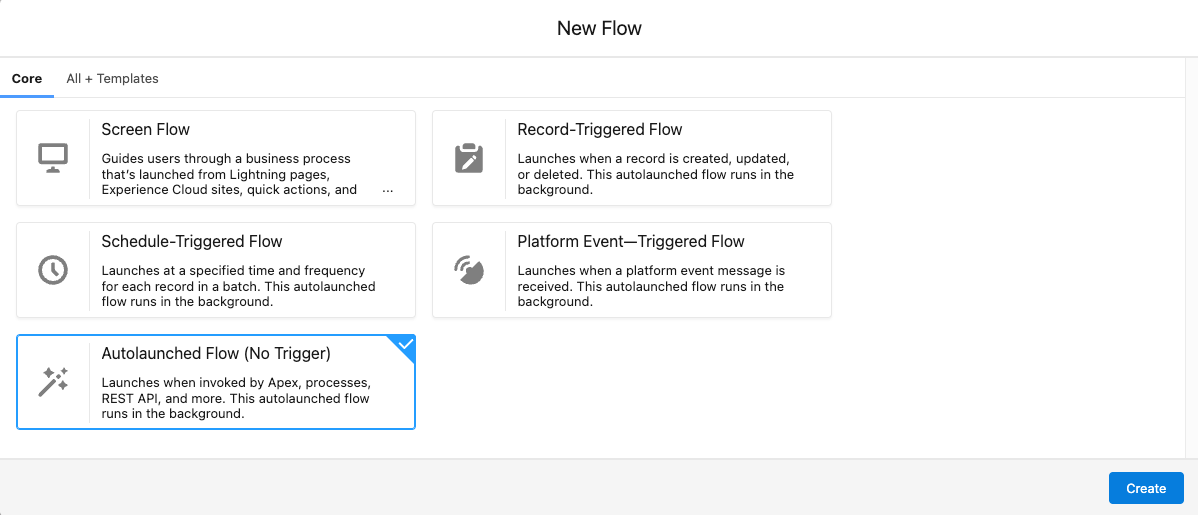
- Open the Flow Builder and create a new Flow. Select "Autolaunched Flow (No Trigger)" as your Flow Type.
Create Input Variables
- We need to define Input Variables to integrate with Campaign Audience Builder. These allow us to pass data into the flow.
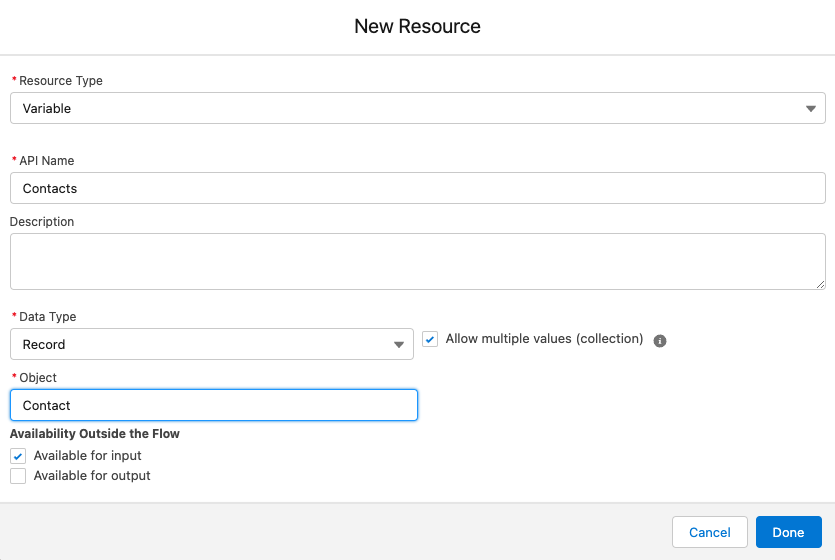
- In our example scenario, we want to use the audience results within the Flow to create related Tasks.
- We, therefore, create a new Variable with the "Record" Data Type, select the "Allow multiple values" checkbox, and mark it as "Available for Input".
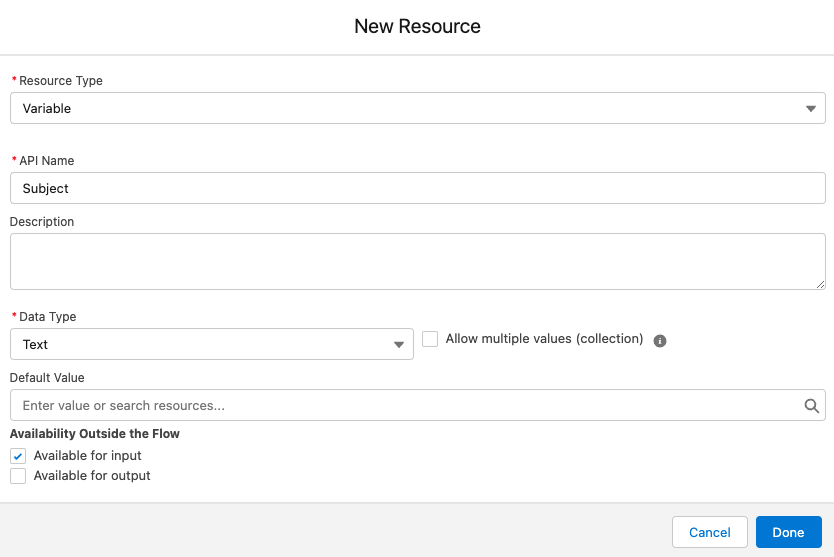
- We also want to allow the users to specify a subject when they run the action, so we create a text flow variable and mark it as available for input:
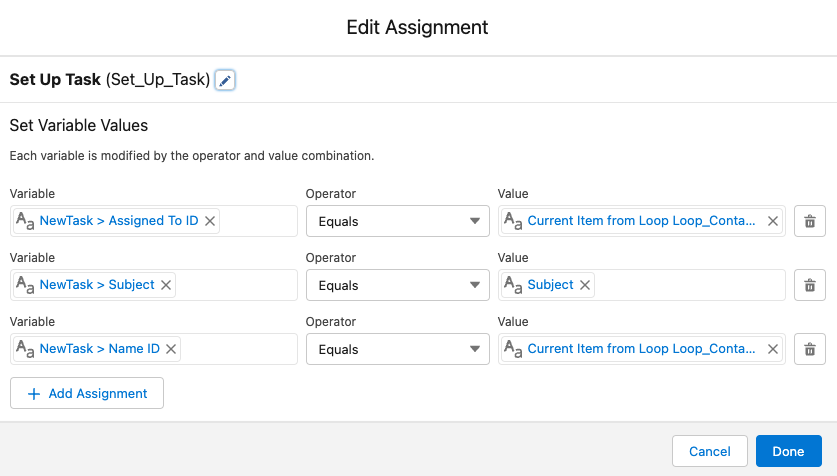
Design the Flow
- The Flow loops over the contacts we pass in and creates a task for each.
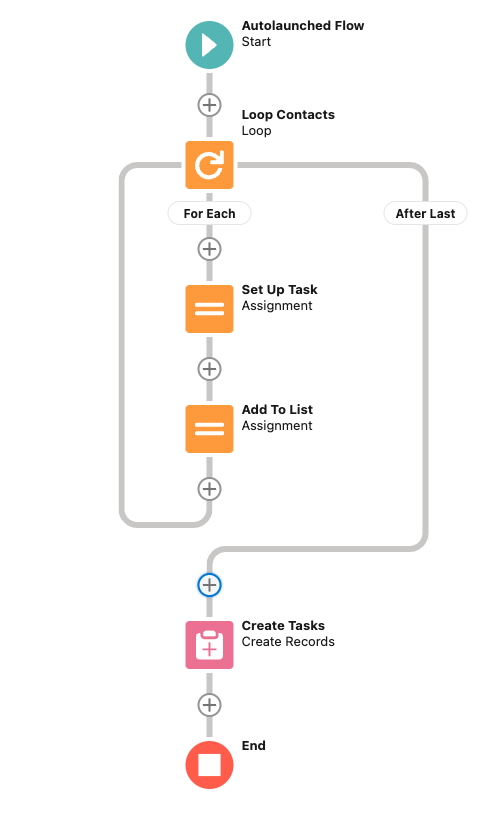
- The subject variable and the contact owner information are used to set some task fields.
- You can also add more information like Status and Due Date, either as fixed values or as additional input parameters, so your users can maintain it.
- With that, we're already done in the Flow Builder. Let's take a look at the integration setup next.
Final Action Setup
- Open the "Settings" tab in the Campaign Audience Builder app, select "Final Actions" in the sidebar and click "New" to create a new action.

- In the first modal screen, we enter the following information:
- Final Action Name: Used as a button label on the audience results page.
- Final Action API Name: Set automatically to identify the final action.
- Type: Choose if you want to use Flow or Apex logic.
- Flow: Search the available autolaunched flows to find the flow you'd like to use.
- Description: Optional. Rich text that will be displayed to the user before they run the action.
- Success Message: Optional. Displayed when the action has been executed.
- Custom Permission Name: Optional. The action will only be available to users with the corresponding custom permission if set.
- Batch Size: Defines the batch size for asynchronous runs of the action - defaults to 500. Depending on the logic you've implemented in your Flow / Apex, this can be increased or needs to be decreased.

- In the next step, choose the object for which your logic has been configured. The action will only be available for audiences with the same result object type.
- In our example, we've created the logic for the Contact object, so we select "Contact":
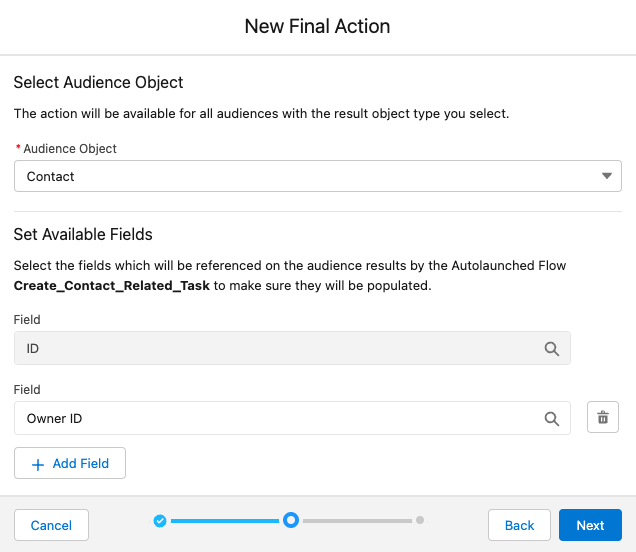
- We must also select all fields that we used in our Flow. We've used the Contact Owner ID as the Task Assignee ID, which should be set when the flow runs.
- Finally, we need to decide which Flow input variables we'd like to include, and we can optionally set default values for them.
- Input Variables with the "Record" data type and the "Allow multiple values" checkbox are defaulted to the Audience Results, which cannot be edited.

- After that, everything is set up and ready, so let's go ahead and try our action.
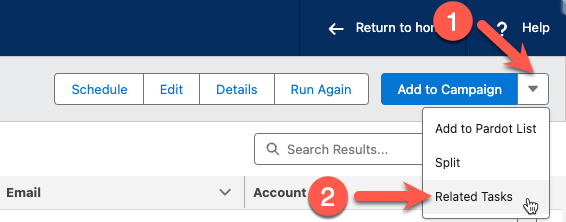
Using the Final Action
- On the results page of our audience, there's a dropdown next to the "Add to Campaign" button for our new final action:
- On click, a modal opens that displays the entered description and allows us to set the input values:
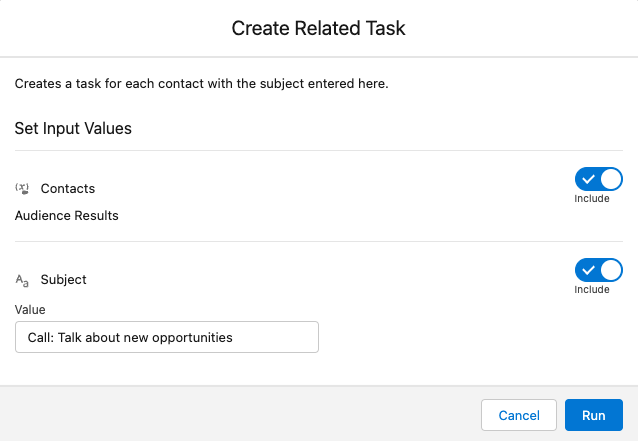
- Click Run to execute the action; the success message is displayed as a toast.

- ... and a new task with the defined subject has been created for each of the audience results:
